An ode to the Frug

Look back. Go ahead and look back in time. Do you remember all of the people, the experiences you had, the books you read, the flavors you tasted. The many influences that make you into the cook you are today? Hell, the person you are today? Look back and smile. Look back and laugh. Enjoy. It’s all been good.

When I was a girl, I loved to bake. I only began to dabble in cooking when I began to stumble onto the many things that would influence what I loved to eat. One person who influenced me was a strange and silly man. A theologian, a historian, he was not a chef. He was a home cook. Endlessly fascinating, clumsy in the kitchen, but knowledgeable and quite possibly the first real foodie I had ever seen. He dubbed himself the Frugal Gourmet and I sat on floor in front of the TV each week to listen to stories, be entertained and watch a man make amazing food in a really nice kitchen with better equipment than I thought I’d ever have access to.

To tell you the truth, I think I enjoyed watching his antics more than cooking out of his books. I loved to watch him. His show made me happy. His recipes were unfortunately inconsistent and he made me into a better cook because I often had to make changes to the recipes to get them to work.

But… I miss the Frug. I was so happy to stumble onto the fact that other people loved him enough to keep recordings of his show and post them on YouTube. I have a treat for you. Here is a quintessential example of why I was mesmerized by his show. Please spend the next half hour watching the Frugal Gourmet bake with sourdough. You won’t regret it. Please keep reading after the show. I baked up one of his other loaves of bread and you won’t want to miss that!

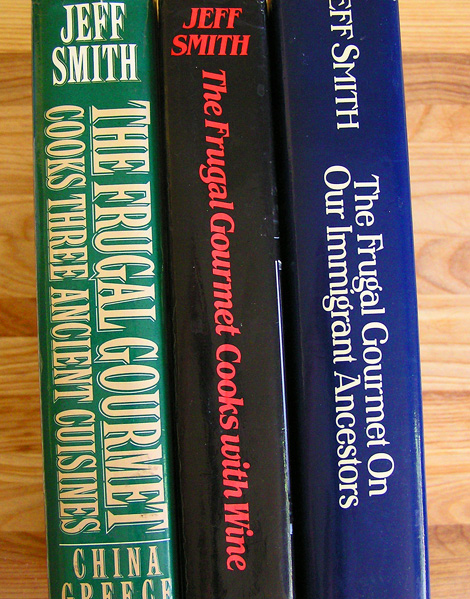
Even after all of these years, I still use my Frugal Gourmet cookbooks. The other day, I whipped out my copy of The Frugal Gourmet on our Immigrant Ancestors. I have to admit that out of the three books of his I own, this isn’t my favorite, and I haven’t really looked at it with fresh eyes in quite awhile. After I made some enchiladas verde con queso using the recipe from the Mexico chapter as a rough guideline (I have completely changed this recipe over the years to be much more healthy), I began to page through this book. There are so many bread recipes. I didn’t know. At the time I got these books, I wouldn’t have dared bake bread. When I got to the chapter on Germany, I became very curious about the pumpernickel bread recipe. It sounded so delicious!

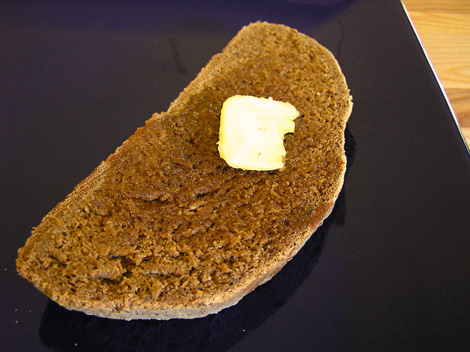
I finally had the chance to bake up a loaf of this wonderful bread today. I’m happy I never tried to bake this bread years ago because I would have been frustrated. The recipe called for over half a cup more white flour than necessary and the bread needed to bake for fifteen minutes longer than the recipe called for which are errors I never would have caught before I became a seasoned bread baker. But, I have to say, I was so happy with this bread. The Frug wrote in his book about this bread: “It is simple to do and the results are better than those of most bakeries that you know” Comparing this to the sourdough rye I made awhile back, it took a third of the time, a third of the kneading and the bread was just as delicious as that much more complex loaf. My boyfriend thinks it is better than the pumpernickel bread we get at a favorite restaurant which comes from a respected bakery. I have to say this is a very close second to that bread too!

If you love pumpernickel bread and want an simple recipe, this is for you! This loaf is going to YeastSpotting, a showcase of fine bread across the Blogosphere.

Pumpernickel bread

Adapted from The Frugal Gourmet on our Immigrant Ancestors by Jeff Smith

4 ½ tsp active yeast

1 ¼ cup tepid water (between 105 – 110 degrees, F.)

1 cup whole grain rye flour

1 cup whole wheat flour

¼ cup molasses

2 tbsp unsweetened cocoa powder

1 tbsp whole caraway seeds

1 ½ tsp salt

1 cup unbleached white flour (possibly more if needed)

Cornmeal for dusting your peel

In a large bowl, combine yeast and water. Allow to proof for 10 minutes. It should be nice and frothy. Add rye flour, whole wheat flour, molasses, cocoa, caraway seeds and salt. Mix well. Add white flour and mix with a heavy spoon or spatula until well combined. Turn out onto a floured board. This makes a very dense dough. The original recipe called for over a half cup more white flour which could be added if the dough is sticky. If your dough is sticky, add a tablespoon of flour at a time if needed. Knead the dough for 5 – 7 minutes. It will become smooth and elastic and the outside will feel soft like your earlobe. (This dough will not be elastic enough to do a window pane test).

Transfer the dough to an oiled bowl. Cover with a heavy cloth and allow to rise until doubled, about an hour.

Punch the dough down. Knead for a minute and then form into a ball. Sprinkle a peel or a rimless cookie sheet with a liberal amount of cornmeal. Lay the dough ball on the cornmeal. Cover the dough with the cloth and allow to rise until doubled again, about an hour.

Put a pizza stone on the top rack in the oven. Also place a metal pan on the lower rack of the oven. Preheat the oven to 350 degrees F. Using the peel or a rimless baking sheet, transfer the dough to the hot stone. Pour about a cup of water into the metal pan to create steam. Bake the bread for 45 minutes. The bread is ready when it sounds hollow when you tap it on the bottom and/or an instant read thermometer reads an internal temperature of 190 degrees F. when poked into the bread.
Braided bread 2.0

BraidedBread3

When I stumbled upon Google books for the first time, I thought it was a dumb idea because I could get free recipes without having to buy books. How are the authors of these books supposed to make any money I thought. However, after spending hours thumbing through cookbook samples just on a search for sourdough, I found my Amazon wish list growing by a bit more than I wanted it to. Therefore, I have decided Google books is an evil and effective marketing tool! Do not. I repeat. Do not go to Google books. You’ll be sorry!

One book that made its way from my Google search to my Amazon wish list to my home (in less than a week) was an amazing book published in the 80’s called Great Whole Grain Breads by Beatrice Ojakangas. This unassuming cookbook has no photographs besides the one on the cover. It is filled, instead, cover to cover with recipes and practical bread baking advice. An inventive baker, Mrs. Ojakangas was baking no knead breads back in the 80s long before the craze hit the Internet (and long before the Internet).

The book is not heavy on purely whole grain bread. Most recipes include a mixture of white flour as well as whole grains in order to give the breads a lighter texture. Being of Finnish extraction, the author knows her rye breads and includes many variations on rye. As well as traditional loaves there are many interesting and quirky recipes such as stir and pour breads which are even simpler than the no knead bread recipes she also provides. There are vegetable breads, cheese breads, fruited breads and coffee breads. Since the book relies on small charming illustrations instead of photos, it is packed cover to cover with recipes.

BraidedBread2

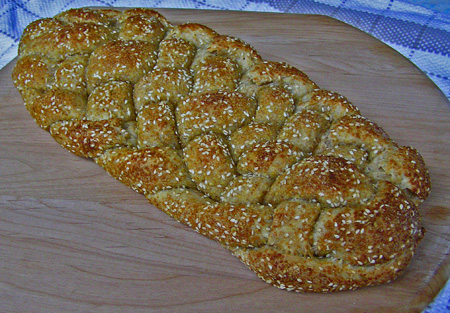
After reading the book as if it were a novel and placing book marks on dozens of recipes, I became obsessed with a recipe that appears in the photo on the cover. It is for Wheat Germ and Sesame Six-Strand Bread. I don’t own commercial yeast but I do own a sometimes temperamental sourdough starter which I stubbornly insist on baking all of my bread with. If you have been following my blog, you already know that I screwed up this recipe last week. Although it was under proofed the flavor was really good and we ate the bread anyway. I decided it was worth it to try again. This week I got it right. I added an extra half cup of starter and let the bread rise all day. The bread was perfect. It was not light and airy like the challah it resembles. The inner texture of the bread was soft more like a multigrain sandwich bread. The crust was crisp and then…there is the outer layer of wheat germ and sesame, nutty and crunchy. Just delicious! The bread was good on its own, but we enjoyed it with olive oil for dipping, salad with a homemade creamy balsamic dressing and chicken that was roasted with olive oil and lemons. This bread was the perfect bread to dip in oil, in salad dressing and in the pan juices from the chicken. It melded perfectly with anything fatty. It is a gorgeous bread for enjoying with food.

BraidedBread4

After succeeding with this bread, I am now very excited to keep exploring this book. I have way too many cookbooks but I don’t feel bad about adding this one to my collection. It is the kind of book that will be used constantly and I predict it will become dog eared in a few months. If you love to bake bread, I seriously recommend this book to you.

I’m sending this bread off to YeastSpotting. Please click on the link to see other wonderful bread baking adventures.

Wheat Germ and Sesame Six-Strand Braid

Adapted for sourdough from Great Whole Grain Breads by Beatrice Ojakangas

1 ½ cups active sourdough starter

½ cup room temperature water

1 tbsp evaporated cane juice or granulated sugar

1 tbsp unsalted butter, melted

1 tsp salt

1 egg

1 cup whole wheat flour

2 cups + 2 tsp (if needed) unbleached white flour

Glaze:

1 egg yolk beaten with 2 tbsp water

¼ cup (or more) wheat germ

2 tbsp (or more) sesame seeds

In a large mixing bowl, combine starter, water and sugar. Let stand a few minutes. Mix in beaten egg, butter and salt. Mix in whole wheat and 2 cups of white flour gradually. Mix with a rubber spatula until a dough forms. Cover and let the dough rest 15 minutes. Turn the dough out onto a board and begin to knead. The dough should be stiff and not very sticky. I needed to add a little more flour to get to this consistency. Add more unbleached white flour one teaspoon at a time until you get a stiffer dough. Continue to knead the dough for up to ten minutes until it is soft and springy. You should be able to stretch it without breaking it (window pane test). Let the dough rest while you wash, dry and oil the mixing bowl. Return the dough to the bowl, cover the bowl with a clean kitchen towel and allow it to rise until doubled (about three hours on a cool day).

Turn the dough out onto a board and divide it into six equal parts (I weighed the dough to make sure each part was roughly the same). Roll each piece into a strand about 12 inches long by rolling between the palms of your hand and the board. Mix wheat germ and sesame seeds in a bowl Brush a dough strand with the egg yolk mixture and then sprinkle 1/6 of the wheat germ mixture onto the board and roll the dough in the wheat germ mixture to coat. Repeat for the remaining 5 strands.

To shape: Line up the six strands side by side. Start with the right outer strand. Pick up the strand and weave it under and over each successive strand until it ends up on the very far left side of the braid. Repeat, always starting with the far right strand, weaving under and then over each strand until it ends up on the left side. When you are done, pinch the braids down on the end of each loaf and compress the loaf lengthwise with both hands gently to make a long narrow loaf. Place a sheet of parchment onto a peel and dust it with corn meal. Gently transfer the loaf to the prepared peel. Cover with a clean kitchen towel and allow it to rise until doubled (3 to 4 hours in a cool kitchen).

Place a baking stone in the oven 15 minutes before you want to bake. Preheat the oven to 375 degrees F. Transfer the loaf from the peel to the stone. It is ok if it sticks to the parchment. Bake the loaf for 25 to 30 minutes or until golden. Remove the parchment from the loaf and cool completely

An all natural treat

Almond Cookies

Last week, I dusted off the Laurel’s Kitchen Bread Book and to my surprise, made the best rye bread I have had.  Such success got me curious for more.  I went back to my library and found my copy of The New Laurel’s Kitchen Cookbook (which was new in 1976, reprinted in 1986).  As I perused the book, I began to remember why I snubbed this book to begin with.  In laurel’s kitchen, food revolves around whole wheat flour, vegetables and cottage cheese.  This book is very crunchy indeed.  I was looking at the small dessert section and noticed the peanut butter cookie recipe.  There was a variation that uses almond butter…very intriguing.   As my eyes scanned the recipe and my brain trotted behind slowly, I came to realize there is no butter or margarine in this recipe.  It only utilizes the fat in the nut butter.  Fascinating!  As I keep reading it dawns on me, there is no refined sugar in the cookies, just honey.  Can you really make a cookie with no saturated fats and no crystallized sugars??  Interesting…

I have been itching to try these for days and finally got into the kitchen to play.  I had just enough almond butter.  Surprisingly, I had almond extract, old but still useable.   My only problem occurred because Mimi staying home all the time equates to Mimi cooking a lot and I was short on honey.  What would happen if I supplemented the honey with pure maple syrup?  I crossed my fingers and decided to find out.  I felt like I wanted something more in these so I decided to add dried fruit, I wanted dried blueberries or dried cherries but don’t have them.  My Boyfriend wanted dried apricots.  Apricots it is!

I have a really hard time making cookies the right size so a recipe that should make between three and four dozen small cookies yielded 23 larger cookies after I adjusted the baking time.  But I bet you don’t mind a bigger cookie do you?  I sure don’t!

So the question is still on the table, can you make a cookie with no butter or refined sugars?  The answer is a resounding yes!  These cookies had a shatteringly crisp crust and a light as air middle.  They were sweet with a creamy mouth feel.  I used chunky almond butter so between the almond chunks and the diced dried fruit, there were crunchy and chewy bits in every bite.  Delicious!!!!!

The trio who wrote the Laurel’s kitchen books should be commended.  They figured out how to cook with natural foods without relying on lots of dairy or refined ingredients for flavor; a very clever and masterful way to cook indeed.

Apricot Almond Butter Cookies

Adapted from The New Laurel’s Kitchen Cookbook

1 cup crunchy almond butter

1/3 cup honey

2/3 cup grade B Maple Syrup

1 egg, beaten

1 ½ tsp almond extract

½ tsp salt

½ tsp baking soda

2 cups whole wheat pastry flour

½ cup diced dried apricots

Blanched or slivered almonds for decorating

Preheat your oven to 350 degrees, F.

In a large bowl, beat together almond butter, honey and maple syrup.  Beat in the egg and almond extract. 

In another bowl, mix together the flour, salt, baking soda and diced dried apricots.

Mix the dry ingredients into the wet ingredients until well incorporated.

Line two baking sheets with parchment paper.  Drop the cookie dough by generous rounded tablespoons.  The cookies should be walnut sized.  You should get about 23 cookies.  Decorate with 2 – 3 slivered almonds or 1 blanched almond.

Bake the cookies for 15 – 16 minutes until lightly browned.  Remove from the oven and allow the cookies to cool for a couple of minutes on the pan.  They will be very soft at first.  Transfer the cookies to wire racks and cool completely.

Baking from a vintage cookbook

SourCornRye

As we travel through life, we tend to collect things.  Sometimes we collect things consciously, sometimes we don’t. 

I love books.  I love to read (although I have to admit that I don’t always read with the same gusto as I used to), and I love the feel and look of books.  Cookbooks are especially alluring for me.  A good cookbook tells a story.  A good cookbook can transport you to another place or time.  I have 128 cookbooks.  I just counted.  How many do I use? If I had to give you an honest number without going back and looking, I would guess a dozen.  It’s not that I don’t love most of these books; it’s just that cooking, like fashion changes with the times and it changes as a person’s tastes may change.

In the eighties, I went through a healthy phase and fancied myself to be a vegetarian.  I was devoted to Molly Katzen’s Moosewood cookbooks and I yearned to be devoted to others.  I purchased the Laurel’s Kitchen Cookbook but couldn’t really fall in love with the book.  Therefore, it was the first of many books to gather dust on my shelves.  Around the same time, I started to develop a desire to bake bread which I didn’t fulfill for many years to come.  I let myself purchase the Laurel’s Kitchen Bread Book during that same era.  The bread book promised that you could bake whole grain bread without the use of refined flours.  The book was very scary to me. 

I am now a much more confident bread baker so this week, I bravely dusted off the Laurel’s Kitchen Bread Book.  Although this book is such a product of its time, it also seems very relevant to me.  Trends repeat themselves and with the local food and organic movements in full swing, a book like this is a good teacher.  Here is a book that can help you buy the healthy whole grains we are told we need to eat and guide us to be self sufficient and know that the food we create is pure. 

I feel silly knowing that I have acquired so many bread books recently as my baking passion has intensified.  So many of these books look pretty but don’t necessarily teach a person to bake.  I’ve had this informative book all along.  A book with few pictures that in reading the text, really teaches baking.

The recipe I zeroed in on was the sour corn rye bread.  The original recipe was not called sour because of a starter.  The recipe includes yogurt and vinegar.  I set about to calculate the necessary changes to make the bread work with my starter.

This bread was an adventure back in time for me.  I tend to rely on my kitchen aid standing mixer for creating my dough.  This recipe called for an unusual method of kneading.  A half cup of water is set aside and as you mix and then knead the dough, you keep dipping your hands in the water to incorporate it slowly into the dough until the dough goes from dry and hard to soft and then “dramatically sticky”.  I have no idea how to do this with my mixer.  By hand it took twenty minutes or so and I did not feel the need to work out at the gym afterwards.

Rye breads always freak me out a little.  For some reason, they never seem to rise for me.  When I give you the recipe below, rising and proofing times will be vague and general based on a cool day in my kitchen and the fact that I left to buy groceries for the week during this time.  Your results may vary.

The resulting bread was fantastic!  It was everything I expect from an excellent loaf of rye bread.  The bread became tall in the oven.  It baked up perfectly.  The texture was dense but had a really good crumb and it smelled and tasted amazing!  I wrapped the bread in plastic last night and stored it in my cupboard.  I expected the bread to suffer from this treatment.  When I opened the bag this morning to serve a slice for breakfast, the most wonderful aroma enveloped me.  The bread was still perfect.  It did not taste stale at all!!

If you are a sourdough baker, I highly encourage you to try this recipe.  (R., that means you!)

I am proud to submit this recipe to this week’s YeastSpotting event on Wild Yeast.  Please visit Wild Yeast every Friday to see other amazing adventures in bread!

Sour Corn Rye

Adapted from the Laurel’s Kitchen Bread Book

¾ cup cornmeal

¾ cup boiling water

3 1/3 cups whole wheat flour

2 cups rye flour

2 tbsp caraway seeds

2 ½ tsp salt

1 ½ cups nonfat plain yogurt

2 tbsp cider vinegar

¼ cup olive oil

2 tbsp honey

1/3 cup active sourdough starter

½ cup room temperature water

Stir the cornmeal into the boiling water in medium sized bowl and set the mixture aside.

Mix the whole wheat flour, rye flour, caraway seeds and salt in a large bowl. 

Mix the yogurt, vinegar, olive oil and honey into the cornmeal mixture.  Stirring the mixture until smooth.

Stir the wet ingredients and the sourdough starter into the dry ingredients.  Use your hands to work the mixture together into a dough.  The dough will be really stiff at this point.  Once the ingredients seem to meld together enough, turn them out onto a very lightly floured board.  Have the half cup of water beside you in a bowl flat enough that you can dip your fingers into it easily.  Knead the bread 10 times and then dip your hands in the water and continue kneading.  You will repeat the process of kneading about 10 times and dipping your hands until you have incorporated all of the water into the dough (crazy I know! But the book recommends we knead whole grain dough 600 strokes!).  Use a bench scraper to keep the dough moving if it sticks too much.  After the water has been incorporated, the dough will be soft.  Keep kneading until the dough becomes dramatically sticky and then stop (I decided mine was ready when it stuck to the board and wouldn’t budge).  The book states this should take 15 minutes, it took more like 20 minutes for me. 

Oil a large bowl.   Form the dough into a ball and place the ball smooth side up in the bowl.  Cover the bowl with a clean cloth and allow it to ferment for 1 ½ to 2 hours (I did two hours because my kitchen was cool.  You should be able to poke the dough and have the hole fill in; I was impatient and moved on to the next step although my dough was stubborn).  Press the dough flat and then form it into a smooth round.  Let the dough rise.  The book states this should take half the time the first rise did but we are working with starter now (not conventional yeast).  I went grocery shopping, came back, the dough still wasn’t ready so I the second rise actually took four hours. 

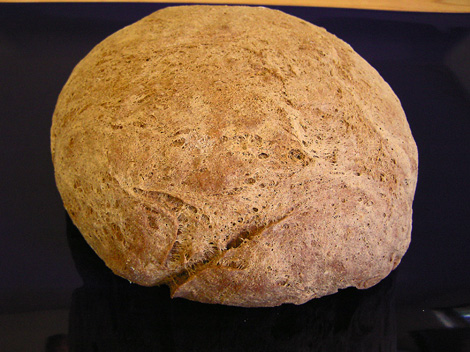
Press the dough flat and divide it in two.  Form each half into a smooth ball, pulling but not breaking the surface so that it is taut.  Pinch the seam at the bottom until smooth.  Dust a peel or a cookie sheet with corn meal.  Place the dough on the cornmeal dusted implement and let the dough proof for up to an hour and a half until the dough returns a gently made fingerprint.  Slash the surface of each loaf.

During the proofing time, place a pizza stone into the oven and preheat the oven to 400 degrees F.  When the dough is ready, place the two pieces of dough on the pizza stone in the oven and bake for 10 minutes.  Lower the heat to 350 degrees and continue baking for 50 minutes.  Remove the bread, and allow the bread to cool on a rack completely before cutting.