Baking from a vintage cookbook

SourCornRye

As we travel through life, we tend to collect things.  Sometimes we collect things consciously, sometimes we don’t. 

I love books.  I love to read (although I have to admit that I don’t always read with the same gusto as I used to), and I love the feel and look of books.  Cookbooks are especially alluring for me.  A good cookbook tells a story.  A good cookbook can transport you to another place or time.  I have 128 cookbooks.  I just counted.  How many do I use? If I had to give you an honest number without going back and looking, I would guess a dozen.  It’s not that I don’t love most of these books; it’s just that cooking, like fashion changes with the times and it changes as a person’s tastes may change.

In the eighties, I went through a healthy phase and fancied myself to be a vegetarian.  I was devoted to Molly Katzen’s Moosewood cookbooks and I yearned to be devoted to others.  I purchased the Laurel’s Kitchen Cookbook but couldn’t really fall in love with the book.  Therefore, it was the first of many books to gather dust on my shelves.  Around the same time, I started to develop a desire to bake bread which I didn’t fulfill for many years to come.  I let myself purchase the Laurel’s Kitchen Bread Book during that same era.  The bread book promised that you could bake whole grain bread without the use of refined flours.  The book was very scary to me. 

I am now a much more confident bread baker so this week, I bravely dusted off the Laurel’s Kitchen Bread Book.  Although this book is such a product of its time, it also seems very relevant to me.  Trends repeat themselves and with the local food and organic movements in full swing, a book like this is a good teacher.  Here is a book that can help you buy the healthy whole grains we are told we need to eat and guide us to be self sufficient and know that the food we create is pure. 

I feel silly knowing that I have acquired so many bread books recently as my baking passion has intensified.  So many of these books look pretty but don’t necessarily teach a person to bake.  I’ve had this informative book all along.  A book with few pictures that in reading the text, really teaches baking.

The recipe I zeroed in on was the sour corn rye bread.  The original recipe was not called sour because of a starter.  The recipe includes yogurt and vinegar.  I set about to calculate the necessary changes to make the bread work with my starter.

This bread was an adventure back in time for me.  I tend to rely on my kitchen aid standing mixer for creating my dough.  This recipe called for an unusual method of kneading.  A half cup of water is set aside and as you mix and then knead the dough, you keep dipping your hands in the water to incorporate it slowly into the dough until the dough goes from dry and hard to soft and then “dramatically sticky”.  I have no idea how to do this with my mixer.  By hand it took twenty minutes or so and I did not feel the need to work out at the gym afterwards.

Rye breads always freak me out a little.  For some reason, they never seem to rise for me.  When I give you the recipe below, rising and proofing times will be vague and general based on a cool day in my kitchen and the fact that I left to buy groceries for the week during this time.  Your results may vary.

The resulting bread was fantastic!  It was everything I expect from an excellent loaf of rye bread.  The bread became tall in the oven.  It baked up perfectly.  The texture was dense but had a really good crumb and it smelled and tasted amazing!  I wrapped the bread in plastic last night and stored it in my cupboard.  I expected the bread to suffer from this treatment.  When I opened the bag this morning to serve a slice for breakfast, the most wonderful aroma enveloped me.  The bread was still perfect.  It did not taste stale at all!!

If you are a sourdough baker, I highly encourage you to try this recipe.  (R., that means you!)

I am proud to submit this recipe to this week’s YeastSpotting event on Wild Yeast.  Please visit Wild Yeast every Friday to see other amazing adventures in bread!

Sour Corn Rye

Adapted from the Laurel’s Kitchen Bread Book

¾ cup cornmeal

¾ cup boiling water

3 1/3 cups whole wheat flour

2 cups rye flour

2 tbsp caraway seeds

2 ½ tsp salt

1 ½ cups nonfat plain yogurt

2 tbsp cider vinegar

¼ cup olive oil

2 tbsp honey

1/3 cup active sourdough starter

½ cup room temperature water

Stir the cornmeal into the boiling water in medium sized bowl and set the mixture aside.

Mix the whole wheat flour, rye flour, caraway seeds and salt in a large bowl. 

Mix the yogurt, vinegar, olive oil and honey into the cornmeal mixture.  Stirring the mixture until smooth.

Stir the wet ingredients and the sourdough starter into the dry ingredients.  Use your hands to work the mixture together into a dough.  The dough will be really stiff at this point.  Once the ingredients seem to meld together enough, turn them out onto a very lightly floured board.  Have the half cup of water beside you in a bowl flat enough that you can dip your fingers into it easily.  Knead the bread 10 times and then dip your hands in the water and continue kneading.  You will repeat the process of kneading about 10 times and dipping your hands until you have incorporated all of the water into the dough (crazy I know! But the book recommends we knead whole grain dough 600 strokes!).  Use a bench scraper to keep the dough moving if it sticks too much.  After the water has been incorporated, the dough will be soft.  Keep kneading until the dough becomes dramatically sticky and then stop (I decided mine was ready when it stuck to the board and wouldn’t budge).  The book states this should take 15 minutes, it took more like 20 minutes for me. 

Oil a large bowl.   Form the dough into a ball and place the ball smooth side up in the bowl.  Cover the bowl with a clean cloth and allow it to ferment for 1 ½ to 2 hours (I did two hours because my kitchen was cool.  You should be able to poke the dough and have the hole fill in; I was impatient and moved on to the next step although my dough was stubborn).  Press the dough flat and then form it into a smooth round.  Let the dough rise.  The book states this should take half the time the first rise did but we are working with starter now (not conventional yeast).  I went grocery shopping, came back, the dough still wasn’t ready so I the second rise actually took four hours. 

Press the dough flat and divide it in two.  Form each half into a smooth ball, pulling but not breaking the surface so that it is taut.  Pinch the seam at the bottom until smooth.  Dust a peel or a cookie sheet with corn meal.  Place the dough on the cornmeal dusted implement and let the dough proof for up to an hour and a half until the dough returns a gently made fingerprint.  Slash the surface of each loaf.

During the proofing time, place a pizza stone into the oven and preheat the oven to 400 degrees F.  When the dough is ready, place the two pieces of dough on the pizza stone in the oven and bake for 10 minutes.  Lower the heat to 350 degrees and continue baking for 50 minutes.  Remove the bread, and allow the bread to cool on a rack completely before cutting.


A new twist on breadsticks

 Twists1

Sourdough starter is a lovely thing. It sits in a jar and doesn’t talk back. All it requires is a little food and water. You may not be able to pet it (if you try, it won’t exactly be pleasant). You can’t teach it to talk, fetch or retrieve your slippers, but you can teach it to play dead. Through the thick and thin of aging parents, loss of love, and loss of work, a little flour and water is all that is needed to keep a constant friend ready to help you bake and forget.

 Several weeks ago, I went to Portland to visit my best friend. She is a loyal visitor to my blog and has followed my sourdough adventures. I suggested a couple of times that she might enjoy baking bread. I didn’t think she was very enthusiastic about bread making until she asked me to bring the starter with me on the plane. I have to admit that I am not a traveler. Travel makes me anxious. I fly so infrequently that I end up flummoxed by the changes in procedures that happen so often in this post 9/11 world. I packed a bit o’ Herbert in a leak proof plastic container nestled into a zip lock baggie with a cold pack to help keep the starter nice and sleepy. I didn’t really think about what was in my luggage until a man next to me in the lobby of the airport sat arguing with a security guard. As I eaves dropped, I came to realize the man was angry because they found a small vial of silicon oil in his luggage and airport security informed him they discarded it. I began to nervously think of the Turkish prisons in the film Midnight Express. Luckily, Herbert must have seemed strange but safe. I made it to Portland without having to explain what was sitting in my luggage.

 R. was tutored in the care and feeding of the starter that week and surprised me the week after with emails containing the most delicious pictures of pancakes, breads and pizza. She seemed to love her new toy! She also let me know that her starter has been named George and George has been “gifted” to several of her friends who are now baking all sorts of wonderful things.

 During that week in Portland, I only managed to bake one thing. I saw this recipe for sourdough grissini on Susan’s Wild Yeast blog and they looked like the perfect accompaniment to the yummy homemade dinners my friend treated me to during that week. I had never made bread sticks and I was pleased by the fact that the recipe was so fast and simple. The breadsticks turned out great and we gobbled them up in two days flat.

Last week, I baked for the first time in weeks. I made pizza. Making pizza made me feel like I am getting my baking mojo back. I began to be on the lookout for something else to bake.  I was thumbing through the latest issue of Cooking Light magazine and there was a suggestion for an accompaniment to a pasta dish. The suggestion was to take frozen breadstick dough and brush it with olive tapenade, twist the breadsticks so that the tapenade gets folded into and around the bread. Since I am never one to do things the easy way, I knew a sourdough version of these breadsticks was inevitable! I made a wheatier version of Susan’s grissini and covered them in tapenade. These breadsticks are mellower than I would have expected them to be with so much olive paste, but the flavor is delicious and the texture is chewy and with a slight crunch to the tips of the bread. The baking time is a bit longer for these due to the fact that I added extra water before I really checked on the texture of my dough and the tapenade may have made them a little moister too.

 This is my submission to this week’s YeastSpotting event on Wild Yeast. Please visit Susan’s blog for more adventures in bread!

Twists2


Tapenade Twists

 120 g white bread flour

220 g stone ground whole wheat flour

200 g water

1 ½ tsp salt

23 g olive oil

230 g well fed, 100 % hydration sourdough starter

4 – 6 oz olive tapenade

 Combine all of the ingredients except for the tapenade in a bowl and mix well. You may need to add extra water by the tablespoon until it forms a medium soft dough. Turn the dough out onto a lightly floured board and knead for 5 to 10 minutes to form the gluten. (You should be able to stretch the dough without it breaking apart). Transfer your dough to a lightly oiled bowl and cover it with a clean kitchen towel. Let the dough ferment for 2 – 3 hours with a fold at 40 and 80 minutes (Fold: Pat the dough into an 8” x 4” rectangle and fold it like a letter. I usually do this a couple of times. Do not pat it roughly, you want to form air pockets and stretch the gluten but you don’t want to abuse the dough).

At the end of the fermentation time, preheat the oven to 350 degrees and line two cookie sheets with parchment paper.

Meanwhile, divide the dough into 3 pieces. Working with one piece at a time, flatten each piece into a 6” x 4” rectangle. Brush the rectangle liberally with olive tapenade. Cut the rectangle into long strips. You should be able to cut about 8 strips from each piece of dough. Move the dough strips one at a time to the cookie sheet. Pull the dough gently to stretch it to the length of the cookie sheet and then twist the dough into a loose coil from top to bottom. Repeat until all three dough pieces are flattened, brushed with tapenade, cut and twisted. Bake the breadsticks for 30 – 40 minutes, until browned. Remove from the oven and transfer the bread to wire racks to cool completely before enjoying.

Late to the party

no-knead-wheat2

A couple of years ago, food writer Mark Bittman wrote an article in the New York times about a remarkable bread that was so simple you could mix the dough with a spoon, you didn’t have to knead it and it could live in the refrigerator for a couple of days where it would magically knead itself and develop the kind of wonderful flavor that really good artisan sourdough bread has but it required such easily available ingredients as instant yeast and regular bread flour.  This amazing bread could be baked in a dutch oven!  This article took the Blogosphere by storm.  Bloggers everywhere were baking up loaves of this remarkable “no knead bread”.  Both seasoned bakers and neophytes were singing the praises of this remarkable bread.  Le Cruset must have made boatloads of money selling dutch ovens to rabid no knead bread bakers.  Recipes evolved faster than viruses.  Books were written about the subject and sold like hotcakes.


At that time a girl named Mimi was just starting to discover her first food blogs.  She entertained the notion that she might want to be a food writer too.  She started to read everywhere about this amazing no knead bread.  She wasn’t sure what the hype was.  She already owned a bread machine, a standing mixer and a food processor.  All of these machines alleviated her from chores such as kneading bread.  Besides.  No knead bread called for commercial yeast.  This girl wanted to be a sourdough baker.


Fast-forward two years.  That gal named Mimi has a food blog and is a pretty decent sourdough baker now.  She is also searching everywhere for healthy recipes.  She buys the February copy of Eating Well magazine and sits entranced, as she reads about someone’s amazing no knead breads.  These recipes are so different now!  All of the recipes she sees in this magazine are so delicious looking.  Her mouth begins to water, as she contemplates actually making a no knead bread, thus becoming possibly the last person in the blogosphere to attempt to make no knead bread.


The recipe that really caught her attention was something called Everyday Whole-Wheat Bread.  The recipe is for a loaf that is over half whole-wheat but fortified with bulghur, wheat germ and honey.  The gal had just received bread pans for Christmas and this was not your usual bake it in a dutch oven bread, so she was excited to give her new equipment a test run.  But wait!  She does not own commercial yeast.  Could she possibly make this bread with sourdough starter instead?  Yes.  Yes she could. And… it was extremely good.


I am submitting this great recipe to this week’s YeastSpotting on Wild Yeast. 


no-knead-wheat1


Sourdough whole-wheat no knead bread

Adapted from Everyday Whole-Wheat bread in the February issue of Eating Well magazine


¼ cup bulgur

1/3 cup boiling water

2 ½ cups plus up to 1 tablespoon whole-wheat flour

1 ½ cups unbleached white flour

2 tbsp toasted wheat germ

1 ¾ tsp salt

½ cup well fed sourdough starter

1 ½ cups room temperature water

¼ cup mild honey

3 tbsp olive oil


Stir bulgur and boiling water together in a medium bowl.  Let stand 15-20 minutes until the bulgur absorbs all of the water.  After the bulgur soaks up all the water mix in the additional 1 ½ cups water, honey, sourdough starter and oil.


In a large bowl, combine 2 ½ cups whole-wheat flour, all of the white flour, wheat germ and salt. 


Combine the wet ingredients with the dry ingredients.  Use a wooden spoon or some other sturdy implement to mix the dough well.  The dough should be moist and a little sticky.  If you feel like it is too dry and won’t mix, add a little water.  If you feel like it is too wet, add a bit of flour.  Mine turned out just right.  Lightly coat the top of the bread with oil and cover the bowl with plastic wrap.  Let the dough rise for 12-18 hours.  (I left it overnight and it worked out to 19 ½ hours, the dough was fine).  Refrigerate the dough for 3-12 hours before starting the second rise.


Generously coat a bread pan with oil.  (The original recipe suggested a 9”x5” pan.  I used a 10”x5” pan and it was adequate).  Stir the dough to deflate it.  Transfer the dough to the bread pan.  Lightly coat the top with oil and then press the dough into the pan, making sure to get it into the corners, with a spoon or your fingertips.  Dust the top of the bread with between 1 tsp –1 tbsp of whole-wheat flour.  Using a lame’ or a sharp knife, cut a ½” deep slash down the length of the loaf.  Cover the pan with plastic wrap.  Allow the loaf to rise for up to 4 hours.  It should get to the top of the pan.  Uncover and let it continue to rise for a few more minutes while you preheat the oven to 375 degrees F.


Bake the bread for 55-60 minutes.  Cover the loaf with foil and continue to bake for 10-15 minutes.  You can test for doneness by inserting an instant read thermometer to look for an internal temperature of 205 degrees.  Alternatively, insert a skewer into the loaf; it should come out fairly clean with just a few crumbs.


Remove the bread from the oven and place it on a cooling rack for 10-15 minutes.  Turn the loaf out of the pan (you may need to run a knife around the edges of the pan) and allow the bread to continue to cool until it is at least warm if not cool to the touch.


Makes one large loaf, approximately 14 slices.


Ciabatta!!

ciabattaroll1

Either it was all my fault or Daniel Leder lied to me.  It was probably my fault.  You see I didn’t use his recipe, just his technique.  Well, as usual, I didn’t really follow the recipe either. But… he said in his book Local Breads that you could turn the ciabatta loaves into rolls that would be perfect for sandwiches.  Well maybe Daniel Leder has been through Weight Watchers because these rolls came out dinner roll size.  Not at all what I would have thought of as sandwich size at all.  Unless you are still after six months reducing your portion sizes like a good little girl and eating the exact proper serving of bread.  Yep, my delusions of grandeur were yet again reduced to… well… propriety.  Good for me I guess, since I am still trying to lose weight, grumble, grumble, grumble…


Perhaps I am complaining for nothing.  What these rolls lack in size they make up for in flavor.  I used whole-wheat flour for the sponge and although this is probably a tactical error when it comes to ciabatta (you see, you want big holes and whole-wheat flour is a dense and wily beast), it sure gave my rolls a wonderful nutty flavor.  I’m thinking that I’ll probably double the size of the rolls next time, take the hit for a double serving of bread, and have the sandwich rolls of my dreams.  For now, I have wonderful dinner rolls.  Now if only I had some soup.


Oh, and by the way, if you love bread, check out YeastSpotting on Susan’s Wild Yeast blog.  It’s funny.  Embarrassing story, but true:  when I first saw YeastSpotting I actually wondered how Susan was finding all of these great bakers writing about their bread each week.  My thought was Susan has a lot of time on her hands.  Well duh!  It would help if I would read the blogs I visit instead of just looking at the pretty pictures.  So Susan, per the instructions on your blog, I submit my ciabatta rolls for this week’s yeast spotting!


ciabattaroll2

Ciabatta Rolls

Adapted from Williams Sonoma Essentials of Baking


Sponge:

½ cup 1% milk, warm (about 105 degrees)

1 ¼ cups room temperature water

1 cup well fed sourdough starter

2 cups whole-wheat flour


Dough:

2 cups white bread flour

1 tbsp kosher salt

1 tbsp olive oil

Extra flour for dusting the work surface.


The night before you plan to bake, Stir together milk, water, starter, and whole-wheat flour in a large bowl.  Cover the bowl with plastic wrap and let the sponge sit out at room temperature overnight (at least 8 hours).


The next day, transfer the sponge to the bowl of your stand mixer.  Attach a bread hook to the mixer.  Add bread flour, salt and olive oil.  Run the mixer at the lowest speed until the ingredients are combined then raise the speed a notch and let the dough knead for 7 minutes.  Cover the mixer bowl with plastic wrap and allow the dough to ferment 3 hours or until the dough doubles in volume.


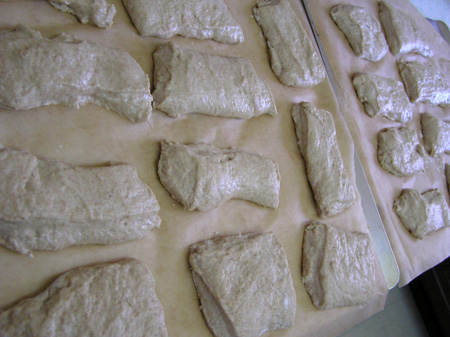
Flour your work surface liberally (the dough will be wet and sticky).  Line two baking sheets with parchment.  Pour the dough out onto the floured surface and pat it into a 10”x12” rectangle.  Using a pizza cutter cut the dough into 2”x3” rectangles.  Use a bench scraper to carefully scrape up and move the rolls to a parchment lined baking sheet.  These rolls should be rustic but be careful as you move them.  They will stick to the work surface, push in on themselves and stick to you.  The nicest rolls I made were the ones that I was carefully able to pick and move in a rectangular shape.  Once the rolls have been moved to their new parchment lined home, cover the baking sheets carefully with a clean dishtowel and allow the rolls to rise 1 ½ – 2 hours until puffy.


Prepare your oven:  Make sure the racks are in the middle and lower thirds of the oven.  While the rolls are rising (maybe a half hour before baking time) preheat your oven to 450 degrees F.  When the oven is hot, add the sheets of rolls and a custard cup full of water (for steam) to the oven.  Bake for 20 minutes.  Remove the rolls from the oven and cool completely before enjoying.


If you close your eyes, this bread is perfect

Sometimes the best tools in the world are nothing if the person using them doesn’t use them right.  Case in point.  I now have a banneton and a lame’ thanks to my good friend R.  I have a baking stone and a peel.  I have good ingredients to work with… but…I can’t seem to make a pretty bread to save my life sometimes.


Things started out ok.  Maybe I didn’t pinch the seam on the bread very well when I formed my boule but doesn’t that bread dough look wonderful!mos_dough

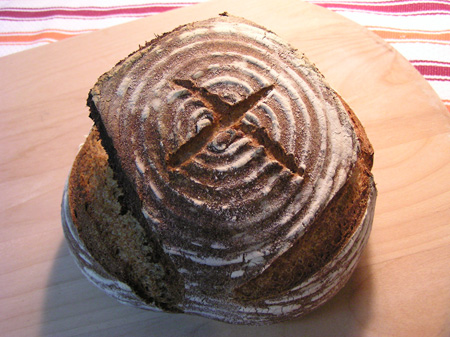
I thought I slashed the dough deep enough but the bread came out looking like the Elephant Man with a quasi-religious tattoo on his head.

mos_baked

But…once I cut the bread open, I saw that the crisp crusted bread with the soft pillowy interior I was promised by the King Arthur Whole Grain Baking book was spot on.  So my bread may be ugly but wow was it wonderful!

mos_sliced1

The original recipe wasn’t whole grainy enough for me so I swapped some of the white flour out for more whole wheat.  Enjoy!


Maple Oat Sourdough Bread

Adapted from King Arthur Whole Grain Baking

Soaker:

1 cup old fashioned rolled oats

¾ cup water

Levain:

1 tbsp ripe sourdough starter

1 cup stone ground whole wheat flour

½ cup water

Dough:

All of the soaker

All of the Levain

1 ½ cups stone ground whole-wheat flour

1 ½ cups unbleached white flour

¾ cup water

2 tbsp maple syrup

1 ½ tsp salt

Cornmeal


The night before you plan to bake, combine oats and water for soaker.  In a separate bowl, combine sourdough starter, whole-wheat flour and water, mix well.  Cover both bowls with plastic wrap and leave out at room temperature 12 hours or overnight.

The next day, the levain should be puffy like a little bread dough (at least doubled in size).  Combine the levain, the soaker and the rest of the dough ingredients in the bowl of a standing mixer.  Attach a bread hook to the mixer.  Mix on low until combined and then raise the speed one notch to knead the dough for 6 minutes. Transfer the dough to an oiled bowl, cover it with a dishtowel and allow it to rise until doubled, at least one hour.  (I went grocery shopping and came back 3 hours later.  The dough was fine since it was cold out).

Turn the dough out onto a floured surface.  Pat it into a rectangle.  Fold the dough into thirds like a letter.  Pat it out into a rectangle and fold it in thirds again.  Put the dough back in the oiled pan.  Allow it to rise another hour.

Heavily flour a banneton.  Carefully remove the dough from the bowl and shape it into a boule (round) pulling the edges down and under until the dough is round with a lot of surface tension.  Transfer the dough to the banneton and allow the dough to rise covered for 1 ½ to 2 ½ hours. 

A half hour before you want to bake, put a baking stone and a cake pan into the oven and preheat the oven to 450 degrees.  Cover a peel with a generous dusting of cornmeal and then carefully transfer the dough to the peel.  Use a pastry brush to brush off any excess flour.  Slash the dough with a lame.  Use the peel to transfer the dough to the baking stone.  Add a cup of water to the hot cake pan for steam.  Bake 15 minutes and then lower the heat to 400 degrees.  Bake an additional 30 – 35 minutes.  Remove the bread to a cooling rack and cool completely before slicing.


Happiness is baking bread

semolina-bread

My best friend tends to spoil me for Christmas and my birthday (just one of many reasons to love her!).  This past birthday, she sent me not one giant box of goodies but two!  She has been avidly following my exploits here on this blog and she knows how much I have been enjoying my bread baking adventures.  The first box of goodies was a box with a bread-baking theme.  The second box of goodies was more kitchen items and food with a gorgeous bird theme.  (She knows how much I have loved birds all of my life).  Getting back to the bread themed box (since I am so single minded and although everything she sent was wonderful, I have been dreaming about using the stuff in the bread themed box for weeks), it contained a banneton, a lame’, a bag of really fine artisan bread flour and the cookbook Local Breads by Daniel Leader.  As I said, I have been itching to use all of these things since the box arrived in September but I haven’t had the time or the energy to devote to a day or two of bread baking.  I have been sick with a cold for the past several days so after going out to run a couple of errands Saturday morning, all I wanted to do was stay close to home and rest.  Bread baking is a calming experience; with lots of waiting for things to happen so I decided it would be a good activity to incorporate into a day of rest.


While I was out during the morning, I stopped into a local ethnic and specialty foods market.  I had no reason to stop there other than to buy a couple of goodies but while I was there I stumbled onto a brand of flour that Daniel Leader recommended in the Local Breads book.  It is Giustos and the company is in the bay area so the idea of getting a high quality and fairly local product was very appealing to me.  It was a bag of semolina flour.  Although the idea of making fresh pasta with some good semolina is attractive to me, I had been keeping my eye out for semolina for the myriad of different bread recipes I keep bumping into that call for it.  I snapped it up.


A quick search of one of my favorite blogs for bread baking, Wild Yeast, reminded me that there was a fantastic bread that I saw there last year that I remembered I wanted to try.  I was really hoping to use the banneton that R. gave me, but I was a little scared to try a new procedure, a new flour and have to figure out how to tweak the baking time for a loaf or loaves instead of baguettes when I was already omitting the yeast in the recipe and relying on my poor abused and neglected sour dough starter for that yeast.  The banneton would have to wait.  I did however use the lame’ and the results were wonderful.  I have been using a sharp paring knife to slash my loaves and the lame’ definitely made a cleaner, straighter cut.  I love using it.


Now because I am still tired from this cold and I didn’t make too many changes to Susan’s recipe, I will link to it at Wild Yeast:  It is called Semolina Bread with Fennel Currants and Pine Nuts.  Here is what I did differently:

  1. In an updated post, Susan suggests toasting the pine nuts.  I did and you should too to give them more flavor.
  2. I omitted the instant yeast and used 3 more grams of starter.  It was chilly in the house and the starter wasn’t as strong as it would have been with the help of the instant yeast so my first fermentation increased from 1 ½ hours to more like 3 ½ hours but the steps for the rest after dividing the loaves and the proofing step took the same time.
  3. I forgot to turn down my oven as she instructs so I turned it down after about fifteen minutes of baking.  The bread turned out fine, could be a difference between my bad old oven and hers.

If you love bread, I encourage you to try this recipe.  These baguettes had to be the best bread I have baked thus far.  The texture was much more rustic and chewy than a normal sourdough with a wonderful flavor from the semolina flour.  The crust was crispy.  The bread had a wonderful sweetness that went well with the bean and butternut squash soup we ate last night and I think it will even go well with some Indian food I intend to make tonight.  I also encourage you to look for good quality flour.  This was the first time that I had really good flour and it seems to have made a world of difference.  The bread tasted very professional. 

flour

A long, cold, slow rise

Well, I really did it to myself last week.  I’ve let myself be under so much stress for so long that my body just gave out on me.  I caught a nasty flu bug and spent half of Memorial Day weekend in bed with the flu.  If you read my last post, you know that we’ve been eating way too much restaurant food and I was looking forward to some home cooking.  I planned to make this wonderful feta stuffed Greek chicken that I love so much.  I even rescued Herbert  (my sourdough starter) from possible sudden death so that I could bake bread. Bread is necessary for this meal to accompany the wonderful feta stuffing.  Unfortunately, Herbert looked pretty awful.  He had managed to produce a two-inch layer of dark gray hooch in the intervening weeks since I last baked.  I truly thought he was a goner. Once I poured off the disgusting, vile fluid and fed Herbert with fluffy wholesome flour and clean water, he was back to normal.  I made that great recipe for sourdough rye baguettes that I’ve been hooked on for awhile.  The dough was fermenting on the counter and suddenly; I felt like I was fermenting too.  The flu hit me like a ton of bricks.


I spent the rest of Sunday in bed with a fever and when all of Monday turned out to be much, much more of the same, I asked F. to put the chicken and some nice grass fed steaks we bought for Monday’s barbeque in the freezer.  I knew I wouldn’t be cooking for a while.  On Sunday, I already knew I would kiss bread-baking goodbye so I had popped the bread dough in the fridge.  The whole rest of the week went by and I never did get back to that bread dough. 


As the week progressed and I felt better and better I started to plan out those meals we missed.  I pulled the meat out of deep freeze and allowed it to defrost in the fridge.  I kept eyeing the bread dough wondering if I could keep pushing it or if I should give up and toss it.  I keep reading about other bloggers who are doing the whole “no knead bread” evolution thingy where you make a master dough, dump it in the fridge for up to a week and lop off chunks of the master dough for fresh bread throughout the week.  I am also well aware that a long slow rise in the fridge for a couple of days makes bread more flavorful. I wasn’t too worried. 


I took the dough out of the fridge this afternoon and let it warm up and rise on the counter.  I popped it out of the bowl a few hours later and kneaded it a bit.  The outer layer of the dough had oxidized.  I had hoped I could mix it in, but it didn’t really knead in, so that worried me a bit.  The dough smelled great and looked great otherwise so I decided that it wouldn’t kill me.  I formed the baguettes and let them rise.  When I baked the bread it rose in the oven really well.  I am out of practice though and didn’t notice the temp was really off in my crazy oven today.  The bread got way too brown.  Luckily, I decided to cover the loaves with seeds so it was hard to tell.  The flavor and texture were really nice on these loaves.  I learned a lesson this week.  I can probably have fresh bread during the week if I plan a couple of days ahead.  Make the dough.  Let it rise all evening.  Pop it in the fridge for a couple of days.  Come home for lunch the day I want to bake and take it out to warm and rise.  I’ll really need to do this.  What a luxury it would be to have warm bread and butter on a work night!


Take care everyone!  Please drop me a message if you have time.  I still check the old blog daily and love to hear from everyone.

Three stubby baguettes

Baguettes

I’m a low maintenance kinda gal.  If I can save myself from a little work, I am a happy camper.  Normally, I keep my sourdough starter in the fridge.  Refrigerating the starter probably doesn’t do much for its development but it keeps me from having to think about its care and well being in between baking sessions.  This past week was an exception.  I took the starter out of the fridge a week ago Friday in anticipation of making pizza.  I knew I wanted to make biscuits later in the week, so I kept it out and fed it daily until Thursday when I finally made the biscuits.  Well, by then it was so close to the weekend that I decided a few more days of feeding wouldn’t kill me. 


Last night, I found a baguette recipe in my copy of Williams-Sonoma essentials of baking.  The recipe was written for commercial yeast, but I was happy to notice a side bar that explained how to make a variation with starter.  The variation called for making the sponge the night before with starter and then the recipe called for commercial yeast in the actual bread dough.  Since I never use commercial yeast anymore, I don’t have any in the house.  I decided to only use the starter for leavening and just stretch out the proofing time a little longer than called for.  I wanted loaves that were a little sturdier than their all white version so I substituted some stone ground whole-wheat and some rye flour for some of the white flour.


The recipe makes enough dough for three small baguettes.  My dough forming skills still need a lot of practice.  My loaves were cute, not pretty.  They are a little malformed and squat and fat.  I love them anyway.  Why?  Because of the flavor and the texture.   I think having the starter out for so long and then giving the sponge a full thirteen hours to do its thing before the long proofing period really gave them a nice sweet tart flavor.  This bread pleasantly surprised me; the center of the bread was fluffy, moist and soft.  Almost like sandwich bread but the outside was crispy to the point that it shatters to the bite.  The sweet tart flavor I told you about hits the tongue and then you taste a touch of salt. 


We grabbed a loaf the minute we thought it was cool enough to eat.  We brought out some manchego cheese and demolished most of that first loaf of bread in a single sitting.  It was so very delicious!


Sourdough wheat and rye baguettes

Adapted from Williams-Sonoma essentials of baking


For the sponge:


½ cup well fed sourdough starter


1 ½ cups water


1 tsp sugar


2 cups unbleached white flour


For the Dough:


¾ cup unbleached white flour


¼ cup rye flour


1 cup stone ground whole-wheat flour


1 ½ tsp salt


cornmeal for dusting your peel


extra flour for dusting your cutting board


The night before you want to bake, Mix all of the sponge ingredients thoroughly in the bowl of a standing mixer and cover loosely with plastic wrap.  Let the sponge stand overnight at least 11-13 hours.  The next morning, the sponge should be very active and bubbly.


Add the salt, white, rye, and whole-wheat flours to the sponge.  With the dough hook inserted into your mixer, mix on the lowest speed to combine.  Kick the speed up one notch and knead the dough for 7 minutes.  The dough should pull away from the sides and form a ball.  If it does not, add a little more white flour a tbsp at a time until it does.  Form the dough into a ball and then grease your bowl and return the dough to the bowl.  Cover the dough with a clean dishtowel and let it rise for 1 ½ to 2 hours.  The dough should double in size.


Punch down the dough.  Shape into a round again.  Re-cover the bowl with the towel and let it rise again for about an hour.


Turn the dough out onto a lightly floured surface and cut it into thirds with a bench scraper or a sharp knife.  Shape each third into a round.  Cover the dough with the dishtowel and let it rest 10 minutes before shaping. 


Work with one dough ball at a time.  Slap the dough hard onto the work surface.  Flatten the dough with the heel of your hand.  Roll a third of the dough to the center and push the seam in a little to seal it.  Roll the dough onto itself until you have an oval loaf.  Elongate the loaf by rolling it on the work surface exerting pressure from the middle of the loaf out.  Dust a peel or a cookie sheet with cornmeal.  Place the loaf on the peel.  Repeat this process with the other two balls of dough.  Let the dough rise for 40 minutes to an hour until it has doubled and the dough feels light and spongy when you lightly poke or squeeze it.


Put a pizza stone in your oven and preheat the oven to 500 degrees f. as soon as you are done shaping the loaves.  Place a cake pan in the oven


When the loaves are done proofing, slash them on the diagonal 4 or 5 times with a sharp knife.  Transfer the loaves to the pizza stone, toss a cup of water into the cake pan for steam and then close the oven door fast and lower the heat to 450 degrees f.  Bake the loaves for 20-25 minutes until they are golden brown and sound hollow when you tap them.  Cool the loaves for 20 minutes before you uncontrollably scarf one down with butter or cheese.


Whole wheat sourdough biscuits: easy and yummy

Sourdough biscuits

I’m usually really good at gauging how much food to make in two nights of cooking to last us most of the week.  Somehow two pizzas and a Rachel Ray recipe for Chicken Goulash did not last us past lunchtime on Wednesday.  Although I am struggling with a weight problem and I have been trying to cut my portions, my boyfriend is one of those lucky people who can eat vast quantities of food and still maintain his weight.  The problem with keeping active and thereby maintaining a high metabolism is that he sometimes loses weight, which he can’t afford to lose.  He seems to be in one of those lose weight without trying modes so I think he tried to remedy the problem by eating bigger portions, thus, we ran out of food.


What to do, what to do?  Well, after lurking around the Arctic Carbivores site for the past couple of weeks, I saw them post a link to a recipe for Sourdough biscuits.  These are similar to buttermilk biscuits but contain sourdough.  I had to have them!  So, I moseyed into the kitchen and found a huge supply of broccoli (not unusual if you know my boyfriend and his love for this cruciferous veggie).  I had some leftover cream, some onions, and more odds and ends.  I would make cream of broccoli soup.  Soup was a great excuse for having biscuits I thought.


The biscuits.  When I saw the biscuits on the other blog, I asked the Blogger what she (or he?) thought the sourdough was doing in there.  I was told that they (one part of the couple bakes the other one blogs) thought it contributed to the “fluffy nature” of the muffins and also helped them rise.  I have to agree.  The recipe calls for the starter, baking powder, baking soda and buttermilk, which together would all help the dough, rise.  After baking up the dough, I have to also say that the starter gave the biscuits flavor and texture too.  Look at the picture.  Do you see the layers?  These biscuits expanded and made fluffy layers!  The insides were soft and the outsides were crisp.  My starter is never very sour, but I could taste a pleasant malted grain flavor that I have often experienced in some of my better sourdough breads.  This recipe is a keeper and if you enjoy sourdough I recommend you try this recipe.  I’m not sure how mine compared to theirs since I used whole-wheat pastry flour, which makes for a slightly heavier end product, but either the whole-wheat pastry flour or white flour should work just fine.  So how was dinner?  The broccoli soup was insipid.  The biscuits were superb!


If you have a chance, run over to the Arctic Carbivores blog.  They are new bloggers but they bake and blog several times a week so there is plenty to see there.  I have to say; I’m impressed by how much they bake.  They are fearless sourdough experimenters and there is a lot of good baking going on over there!


Sourdough biscuits

Adapted from the Golden sourdough biscuits recipe on Recipe finder


2 cups whole-wheat pastry flour


1 tsp baking powder


1 tsp kosher salt


½ tsp baking soda


½ cup cold unsalted butter


1 cup well fed sourdough starter


½ cup buttermilk


1 – 2 tbsp melted butter for brushing the muffins


Preheat the oven to 425 degrees f.


In a largish bowl, combine the flour, baking powder, salt and baking soda.  Using a pastry-cutter cut the cold butter into the flour mixture until the mixture resembles coarse crumbs.  Don’t let the butter get too warm, you want the cold butter chunks to stay pretty solid to help with the flakiness of the finished biscuits.  Mix together sourdough starter and buttermilk.  Add the buttermilk mixture to the flour mixture.  Using a silicone spatula, mix the dough until well combined. 


Turn the dough out onto a well-floured surface.  Knead the dough a dozen times.  The original recipe says to roll the dough to a ½” thickness.  I think we can get away with slightly thicker biscuits.  Mine seemed a little wimpy this time around.  Cut the dough with a 2 1/2” biscuit cutter.  Line a cookie sheet with parchment paper or butter the cookie sheet.  The original recipe instructed us to place the rounds 2” apart but they did not become larger in girth just in height.  I didn’t want to use a second cookie sheet so I placed my biscuits close, almost touching in order to fit them all on the same sheet and they were fine. 


Bake the biscuits for 12 – 15 minutes until golden browned.  Remove from the oven and brush the biscuits with melted butter.  Allow them to cool before serving.  I tried them both hot out of the oven and cooled down.  The cooled biscuits had a much more complex flavor. 


A loaf of homemade bread at last!

Raison Walnut Sourdough


I have an admission to make.  This won’t be news to anyone who really knows me well.  But for those of you who don’t know me, I really dislike the holidays.  I’m not a shopper and I am big on procrastination so I end up being so stressed out that a crumple into a tiny little stress ball that keeps imploding and imploding until I feel like a lump of coal.  Early in the month of December, I saw a couple of blog events that dealt with holiday baking that I would have loved to participate in, I even bought the ingredients for some amazing looking but horribly complex cookies.  I was so close to participating and as a new Blogger, I know I should have, but I didn’t.  I normally try to do some baking but I couldn’t.  After an office potluck (I brought salad in a vain attempt to eat something healthy), a department Christmas party, family staying with us for a week followed by all of us joining more family further south for another week, I was drained.


Before all of this mayhem started, I bought myself a present of a couple of cookbooks.  I wasn’t able to think of touching them before the New Year, but now that things are calm, I was able to get a look.  One of the books I got was the King Arthur Flour whole-grain baking book.  This book has some really fantastic looking recipes and I can’t wait to delve into the recipes further.  For now, I was after sourdough.


Poor Herbert has been languishing in the fridge for weeks and weeks.  I did give Herbert a mercy feeding sometime before Christmas, but I really felt like I needed to use my sourdough starter for real.  Using the starter usually entails a couple of days thawing from the cold and a couple of good feedings.  The mercy feeding consisted of some food and a quick couple of hours to absorb it before going back into lockup. 


I chose to make sourdough waffles from another book I got in the same shipment:  Wild Fermentation by Sandor Elix Katz.  I also chose to modify the Walnut-Currant Sourdough Bread recipe from the King Arthur Flour book.  I fed Herbert the day before I wanted to start and then set up two preferments the night before I wanted to bake.  Both of these sourdough goodies came out really well.  Here is my take on the bread:

 Raisin-Walnut Sourdough Bread:

Adapted from the King Arthur Flour whole grain baking book


Levain: 


½ cup stone ground whole-wheat flour


¼ cup room temperature water


1 tbsp, active well fed sourdough starter


Dough: 


The entire Levain from above


1 ½ cups stone ground whole-wheat flour


1 cup unbleached white flour


1 cup room temperature water


2 tbsp honey, use an assertive honey like an avocado or buckwheat honey


1 tsp salt


¼ cup raisins


¼ cup walnuts, broken up if in large pieces


Corn meal


The night before you want to bake, make the levain.  You want to give the mixture at least a full twelve hours to ferment.  The book said it would look bubbly and expanded when it was ready, mine just looked like mini bread dough but it definitely doubled:  Mix whole-wheat flour, water and starter well.  Cover the bowl with a layer of plastic wrap.  Once again, leave to ferment overnight, at least twelve hours.


In the bowl of a standing mixer combine the levain, whole-wheat flour, white flour and water.  Use your paddle attachment to mix the ingredients at the lowest speed until just mixed together.  Let this mixture stand 20 minutes.  After 20 minutes, add honey and salt.  Mix on low speed until the new ingredients are mixed in thoroughly.  Increase the speed to kneading speed and knead the dough for two more minutes.  Cover the bowl and let the dough rest thirty minutes.


After thirty minutes, turn the dough out onto a floured board.  Pat the dough into a 6”x9” rectangle.  Sprinkle the raisins over the dough and then fold the edges horizontally in over the raisins.  Pat the dough into the 6”x9” rectangle again.  Sprinkle the walnuts over the dough and then fold the dough into thirds again.  Move the dough to your bowl and let it rise for thirty minutes.  You will now repeat the patting, folding, thirty-minute rest sequence three more times.  After you have folded and rested the dough a total of four times for 2 – 2 ½ hours total, shape the bread into a round being careful not to let the raisins or nuts tear the surface of the bread.  Turn the loaf into a floured banneton (I didn’t get one for Christmas, but this book taught me that you can line a colander with a floured linen dish towel to mimic a banneton, how cool and money saving is that?!).  Cover the dough and let it rise 2 – 3 hours. 


45 minutes before baking time, preheat the oven with a pizza stone and a metal pan in it to 450 degrees.  When you are ready to bake, sprinkle a peel or a baking sheet with corn meal.  Invert the dough out of the banneton and onto the peel.  Use the peel to move the bread to your baking stone.  Toss a cup of water into the metal pan for steam and close the oven door fast.  Bake the loaf for 15 minutes and then lower the temperature to 400 degrees.  Bake for 30- 35 minutes longer. Use the peel to remove the bread from the oven to a cooling rack.  Cool the bread thoroughly before letting yourself get tempted to cut off a big slice.  The bread will keep cooking until it cools.


This bread had a dense crumb and a shatteringly crisp crust the night I baked it.  The next day after being stored in a plastic bag on the counter, the crust was chewy but the bread had a wonderful flavor.  This loaf was incredible used as the bread for a fried egg sandwich in the morning.

« Older entries Newer entries »